Saturday, April 20, 2013

Phenomenal Tip: An Organized Kitchen

Meal planning and food prepping are two very important areas in my life as a homemaker.  The Phenomenal Papa and the kids are big eaters, and so meal times are events which they look forward to with great anticipation.  I always try to make an effort to prepare delicious and nutritious meals for breakfast, school lunch baon, merienda/after-school snacks, and dinner.   But I am also a busy with other duties such as bringing the kids to and from their activities, helping my youngest with homework (on school days), and other things that domestic engineers attend to.  Having said that, an organized kitchen makes my meal planning and preparation run as efficiently and smoothly as possible.

One of the areas in my house that I intentionally maintain to keep organized is my kitchen, specifically my pantry and refrigerator.  
I like to keep a lot of things in my refrigerator; not necessarily leftovers, mine is more like a depository of the numerous condiments that I use in cooking.  To keep everything in order, here are some of the things that I observe:

1.  USE PLASTIC BINS.  The single most important thing that I have implemented to maintain the order inside my ref is the use of  plastic baskets that I buy from Saizen or SM Megamall.   I like to organize like items in one basket.  Vitamins in one container, condiments in another one, jams and salad dressing in yet another.

Similarly, each type of freezer item gets its own basket: beef, pork, fish, frozen vegetables and fruits for the kids' smoothies, etc.    

This system works for me because it makes it very simple for me to see which items are running low and need replenishment.   It also cuts in half the amount of time I search for items in the ref and freezer.  I just pull out a bin, get the item, and return. 

2.   FREEZE THINGS FLAT.  To get the most out of the freezer space, I freeze items flat (such as ground beef and pork, etc) and then, once they are completely frozen I stand them up in the individual plastic baskets.  I usually buy meat by the kilo and ask the butcher to pass them through the grinder twice; then I ask him to pack them individually in 200-gram pouches.   
3. FIRST IN, FIRST OUT.   I also follow the FIFO rule.  I make sure that the newly bought item is placed behind the item that has already been there.  Essentially what that means is I use things up in the order that I purchase them.  

4.  Label everything.  I usually marinate a portion of newly-purchased meat right after I get home, and I label every container so I don't have to double guess the contents. My schedule is always crazy since I bring the kids around to their different activities.  More so when it's a school day, since my kids also bring lunch baon to school.  If I don't prepare in advance, I don't think I could afford to wake up at the time I do, and have time to prepare their lunch.  Since I already marinated most of the meat in advance, all the maid has to do is look at the menu the night before and move the corresponding container to the ref to let it defrost in the ref overnight.

In a few days, I will be flying out to chaperone my eldest for the biggest sporting event in the country, Palarong Pambansa. So even if I won't personally cook food for the other members of my family, they won't feel it that much as I have already prepared meals for them, all just ready to be cooked.

Another area that I pay close attention to is my pantry.  The pantry is one small space that has to function big.  So it is important that it is organized in a way that keeps it easy to search for items on a daily basis.  I love to visit my pantry, and I admit to intentionally leaving the door open a few times just to look at it.  An organized pantry does make me smile!  

Like what I do to my refrigerator, my pantry items are also organized to type.  Similar items are placed together. 
 My pantry is sized generously that I also have an area for all my baking ingredients, and even a space for the Phenomenal Papa's fave drinks.


I hope you are able to pick up  get a few of my tips on kitchen organization to use in your own kitchen!  I would also like to hear how you keep your own kitchen spic and span! Do share!


Thanks for reading "Our Phenomenal Life." If you subscribe to the blog via RSS feed or via email, you'll get new posts sent straight to you, for free! 
Like this post? Subscribe here.
Share

Tuesday, April 9, 2013

Phenomenal Tip: DIY Light Switch Dress-Up with Washi Tape

My blog has moved.  Please read more post at the phenomenal mama.   I hope you follow me there to read NEW posts!

There’s something about simple projects that makes me really happy! I have purchased several rolls of washi tapes the past month, and they've all just been sitting idly.  I intend to do some crafts with the kiddos using washi tape, but since we have not gotten around to agreeing on what to do yet, I just went on ahead and got crafty yesterday afternoon - by myself!  

Oh how fun it was to just have some time to do crafts by myself!  When it comes to crafting, I usually supervise the 2 younger kids, so I do not technically do crafts, instead I watch over them as they do the project.  This is one fun project to do when you're one crafty momma who doesn't have a lot of free time on your hands.

Doing this lightswitch dress-up with washi tape took me less than 5 minutes, from taking off the switch plate to finally putting it back up.  Really!  It is that easy.  The only materials you need are:  washi tape and scissors.

1.  Remove plates from the wall  using a metal spatula or scissors.

2.  Choose washi tape to match the theme of the room.  The girls' room is painted a combination of citron and aquamarine.  So I chose my teal colored washi tape for this project.

3.   Make sure to apply tapes in straight line.
4.  In addition, make sure the patterns are lined up against each other.
5.  Cut tape with scissors when you reach the ends and tuck it under the back of the plate.
 

6.  When you reach the corners, simply cut along the edge.

7.  Then tuck one part in.

8.  The other remaining part, you cut diagonally before you tuck in. 
9.  Makes for a clean finish!
10.  Put back plates.  Step back and admire your handiwork!  
 

You can view more washi-taped light switches right here. 


Thanks for reading "Our Phenomenal Life." If you subscribe to the blog via RSS feed or via email, you'll get new posts sent straight to you, for free!  Like this post? Subscribe here.
Share

Monday, April 1, 2013

BYS Make-up 101


As a mom to three active kids, I rarely have time for long beauty treatments, nor a daily full-on beauty regimen. My daily make-up routine usually lasts all of 10 minutes: tinted moisturizer with SPF, powder, blush, gloss! I normally just tie my long hair up in a bun to get things moving along faster. 

But coming from a recent make-up 101class, I realized that taking an effort to fix myself up offers me an extra dose of happy in an otherwise regular day.
A few weeks ago, I was invited for a make-up training session hosted by BYS Cosmetics. I was daunted to find myself face to face with this huge box full of make-up. I am not a make-up junkie, so seeing all these beauty products in one place really overwhelmed me.
 
I came out of the session feeling more confident of my newly-found make-up skills.   Here is a step by step on how to put on make-up that will surely get you compliments. 

1. PRIMER. Apply primer to entire face, and let set for 1 minute.
2. LIQUID FOUNDATION. The BYS matte liquid foundation is perfect for oily skin as it offers coverage without the extra moisture. An extra thirty seconds is well-spent to make sure that you blend the foundation carefully.
3. LOOSE POWDER. To make sure that make-up stays on longer, set it by sweeping some powder with a kabuki brush.
4. EYEBROWS. Fill in brows with an angled brush and some powder. Personally, this step is so important for me as they bring my face out
4. BRONZER. Bronzer is used to contour the face and gives it a radiant, luminous glow.  Apply on the side of the face; on the forehead, near the hairline; sides of the bridge of the nose to give illusion of height.
5. BLUSHER. Apply on the cheeks to provide a natural, long-lasting highlight to cheekbones.
6. EYELINER. Use a shade of warm brown as it is less harsh looking than black. Line upper lid, and finish by curling the eyelashes.
7. EYESHADOW and MASCARA. Using soft, gentle strokes, add neutral colored eyeshadow first to act as the base; follow with a darker shade on the crease; finish by adding a very light eyeshadow (or some loose powder will do) on the browbone.  This will serve to clean-up theyour eyes and give the illusion of .  If you have time to spare, swipe mascara one or two times on upper lashes.
8. LIPS. Apply a tinted lip balm for the day, or a long-wearing lipstick for special events.
And now, anytime I feel lazy and pressed for time, all I just have to do is look at my before and after pics to convince myself that a few added minutes to my morning routine can spell the difference between frumpy and fabulous.:)

The BYS swag bag.  Complete with all the essentials!
BYS Cosmetics is an Australian cosmetics brand which has recently made its way into the Philippine market. I love the BYS Minerals Naturale line. Their mineral make-up is formulated with all-natural ingredients free of chemicals, dyes, preservatives and talc.  BYS mineral products are quick and easy to apply, and provide a complete, smooth, natural coverage in just one step.

Another standout from BYS is its line of Baked Cosmetics . The Baked Bronzers and Blushers are made with a formula that keeps oiliness and moisture at bay and hides impurities. Texture is ultra silky and may be used wet for thicker coverage and dry for a more natural, lighter effect. 

BYS is a new affordable cosmetic line in the Philippines now available in 26 selected SM and Watson’s outlets in Metro Manila and a few key cities like Cebu. 
Like BYS Cosmetics on Facebook to get updates on products.


Thanks for reading "Our Phenomenal Life." If you subscribe to the blog via RSS feed or via email, you'll get new posts sent straight to you, for free!  Like this post? Subscribe here.
Share

Tuesday, February 26, 2013

What's In My Cart: My Favorite Pancake Mix

There are new things coming up for this blog. And in preparation for the exciting times ahead, the blog will be moving to a new home!  While I will still be writing about our phenomenal life, it will now have a new name. 

From now on, I will be doing all of my posting at The Phenomenal Mama


I hope you could all bookmark the new site and follow me there!


I will still be keeping this blog open so you can read all of my old posts.  But you won't miss a thing with the new blog as it will have all of the old posts, as well. 

* * * * *
 
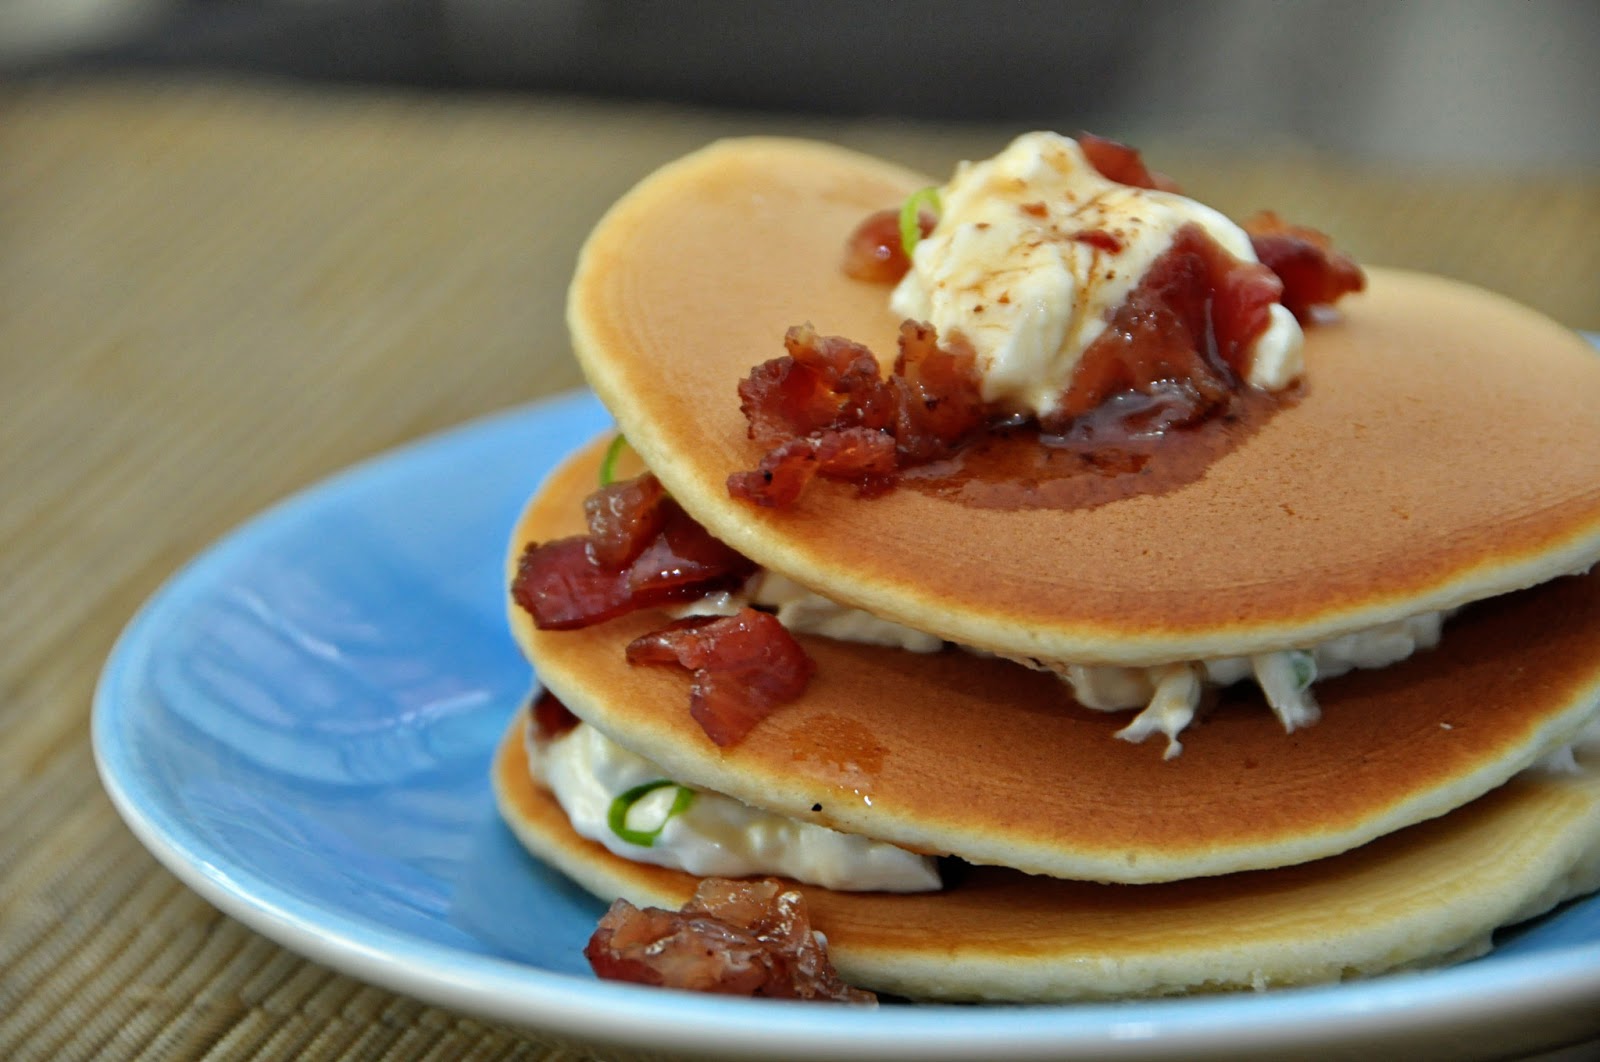
One of my family's favorite breakfast food is pancakes. They love it when it is piled this high and layered with maple syrup, whipped cream cheese, and bacon.  Scrumptious!
There is no shame in admitting that I use a pancake mix.  When I prepare breakfast, time is usually of the essence, especially if the family want to sit down and eat together on the table before C leaves for the office.  With a pancake mix, I just add egg, water and oil, and pancakes are served in no time. 

I have tried almost all the pancake mixes available in the market.  For a long time, I've been a loyal Pillsbury user, and then I shifted to Magnolia Pancake Mix.  I prefer to add my own eggs so I do not buy the one-step pancake mix, where all you have to add is water.  Between the two brands, my kids like Magnolia better, but I found it a bit too sweet for my taste.
We have tried the imported mixes like Betty Crocker and Krusteaz, but we did not find the flavor and texture outstanding; plus the gigantic boxes they came in made storing them in the pantry a hassle. 


After testing almost all the brands available, our family have found our favorite: MAYA Original Hotcake Mix.  As they claim in the package, it is really fluffy and tasty.  The 500-gram box comes with 2 plastic packets inside, but we are a family of big eaters so the entire box is just right for my family of five, with no leftovers.

 
And because the bacon bits really did make me happy today, here's my recipe for the Pancakes with Bacon, Whipped Cream Cheese, and Maple Syrup
  • Pancake mix
  • bacon, cut up to bits
  • 4 ozs. cream cheese, cubed and at room temperature
  • 2 tbsps all purpose cream
  • maple syrup, or if not available from your grocery, any pancake syrup
{Pancakes:}
1.follow package directions

{Bacon Bits:}
1.Cook bacon bits in a non-stick pan without putting oil.  Cook until the bacon has rendered its own fat and the bacon bits are nicely brown.
2.Drain oil, and put on kitchen towels to take out excess oil 
3.Let cool.

{Whipped Cream Cheese}
1.Whisk together cream cheese and cream until light and airy.    

Assemble in layers and enjoy! 

Thanks for reading "Our Phenomenal Life." If you subscribe to the blog via RSS feed or via email, you'll get new posts sent straight to you, for free!  Like this post? Subscribe here.
Share

Tuesday, February 19, 2013

The Cheese Steak Shop Food Truck


C and I are great fans of The Food Network's The Great Food Truck Race hosted by Tyler Florence.   We've always wondered how Manila would welcome gourmet food trucks.  Mobile food peddlers who sell their wares via push carts are no stranger to our streets, but we've always wondered if food trucks would hit it big in Manila.

Last December, when my family was traveling along Ortigas Ave., we saw this huge food truck parked at the complex of City Center (between Madison and Roosevelt sts.).  We knew we had to do a u-turn to get to the other side of the road where this big red truck is.
The Cheese Steak Shop is an original franchise from the U.S. Cheese Steak Shop that is famous all-over California.   The Cheese Steak Shop Food Trucks are now roaming the streets of Manila, bringing the taste of authentic Philly cheese steaks to almost every corner of Manila. I have no idea how many food truck they have; but, this food truck has been in the same spot since December of last year.  


Our server boasts that almost all of the sandwich's ingredients are all imported from the U.S. commissary.  And even the bread for the famous hoagie is imported from Amoroso's Bakery from Philadelphia.
We ordered the 7" classic philly cheese steak, King of Philly, and Italian hoagie, plus sides of onion rings and garlic fries.  Sorry no food photos aside from the one of the fries below.  The sandwiches were ginormous, and eating them in the car was a feat unto itself.  Taking photos in the car was an impossibility.  We ate all the sandwiches in the car - drips and food spills, notwithstanding.  Yeah, family of gluttons.:)


I found it a bit pricey.  But it really tasted soo good... the steak,bread, and fries, it makes it all totally worth it.  We will be having some more again very soon!


The Cheese Steak Shop Manila has two branches, located at 140 Amorsolo St. Legaspi Village, Makati and The Fort Strip, Bonifacio Global City, Taguig.  The food truck goes around so it might not be at the City Center in Ortigas by the time you are reading this.

Thanks for reading "Our Phenomenal Life." If you subscribe to the blog via RSS feed or via email, you'll get new posts sent straight to you, for free!  Like this post? Subscribe here.
Share

Tuesday, February 12, 2013

Nihonbashi Tei

We had our usual Sunday lunch at Nihonbashi Tei in Makati.  I can't remember the last time I ate here, but I know it was a long time ago, maybe around 3 years back.  The place looks exactly the way it did the last time we visited.  The place was already packed with diners by the time we got there at close to 12 noon, and it's a good thing we were able to get a function room, away from all the diners.

Whenever we eat at Japanese restaurants, my kids always order the california maki.  This plate is already half-eaten as the kids devoured the sushi rolls as soon as it was placed on the table.

The spicy salmon sashimi is not really that spicy. It's thinly-slivered marinated salmon on a bed of sushi rolls, topped with crunchy tempura crumbs. 
 

The takoyaki is forgettable. I found the bits of minced octopus rubbery and hard to chew.  

The salmon onigiri came with the bento lunch set; and while not spectacular, was able to satiate hungry tummies.


We ordered the chasho shoyu ramen (shown below) for the kids to share and the shrimp tempura ramen for C and I to share, (no photo of the shrimp tempura ramen because C finished off before I could take a photo.)  He saved some for me in a small bowl; but I thought the tempura batter was overwhelmingly thick, and made the shrimp look smaller that it already is.

C loves sashimis, and he usually orders salmon and hamachi.  We were initially happy to see that the price of the hamachi sashimi was not as high as other Japanese restaurants; but we were disappointed when the hamachi came, for it was not as fresh as we would've wanted it.  Probably because it was not a very fast moving item because of its price point.  

The Asari clams could be better.  The buttery sauce was a bit bland, but nothing that fresh clams couldn't make up for.

The kids love the beef teppan, but I didn't get to taste it.

There's a wall full of Japanese beers and liquors right in front of our private room, but surprisingly C didn't order any.


I found the quality of the food suffered compared to the last time we ate here.  While the food was not bad, it failed to impress.  Maybe it was because it was a busy Sunday lunch, and the kitchen found itself overwhelmed.  Still, everything on the menu is affordable and the staff is efficient and friendly.
Overall, a place to go if you want fast service, affordable and decent food.

Nihonbashi-tei Makati
806 Arnaiz Avenue, Pasay Road, Makati City, Metro Manila. Philippines. 
Tel: +632-818-8893

Thanks for reading "Our Phenomenal Life." If you subscribe to the blog via RSS feed or via email, you'll get new posts sent straight to you, for free! 
Like this post? Subscribe here.
Share

Thursday, January 31, 2013

Phenomenal Tip: Ways to Re-Purpose Your Child's Old Crib

I have long donated all my maternity clothes; my baby stroller and car seats have been given away as well; newborn onesies and booties have found new owners, too.  I've given them all away since I don't have any more plans to get pregnant - ever again. (saying this with fingers crossed... in both hands.  hahaha!)

If you are lucky enough to have managed to hold on to your crib and crib mattress, I found several photos that show the many ways on how to repurpose old cribs and mattresses.  The projects look so dreamy, you'll be tempted to make one yourself. 

Here is the crib re-purposed into a toddler arts and crafts table.  Just take out one side of the rail, add some chairs, hang some supplies, and your kids now have their very own crafts center.  I wished I had seen this earlier, when my kids were younger and easily impressed.  This is a really efficient and cheap way to repurpose the crib.  No additional hardware or carpentry works necessary. 
It could also just be repurposed into a simple toddler study desk... because good study habits are easier taught when kids are younger.  I love the chalkboard tabletop, where kids can doodle all they want without the parents having to worry about the walls.


The photo below shows a grown-up take on the repurposed crib. I would love to have one like this. 

Cribs can also be made into a love seat, with a few carpentry works required.  The crib matress also doubles as cushion. 


Love the "princess and the pea"  look of this multi foam sofa.  Perfect for a little girl's playroom.
with a few modifications, the crib frame can even be a hanging daybed

Should you go ahead and convert the crib into a toddler desk, the crib mattress is not a lost cause as it can also be used alone   As you can see, it easily converts into a two-seater daybed.  

This one looks right at home in a Japanese minimalist home


And even that crib bumper pad, can be repurposed into a bench cushion.  Just cut the bumper pad in half and put the two halves alongside each other and tie together.

I bet I have you looking for that old crib and mattress.:)

*double click on the photos for the source
Thanks for reading "Our Phenomenal Life." If you subscribe to the blog via RSS feed or via email, you'll get new posts sent straight to you, for free!  Like this post? Subscribe here.
Share
Related Posts with Thumbnails