In my family, we always like to save the best for last. So it is just apt that we do this Iron-On Project during the last few days of summer.

This project is relatively easy to make, and is a great way for the kids to let their personality shine through as they choose their own image to transfer.
R has a lot of dinosaurs roaring in his mind these days, so naturally...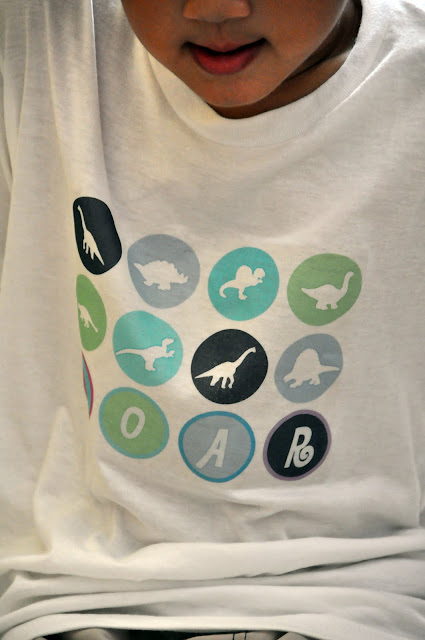

B's design seems to say: "Well-behaved women don't make history." A cat with angel's wings... and a leather studded cuff and body piercings.

J dreams of being in a fantasyland with a pegasus and other winged creatures.

While I chose to have a spider crawling down the back of my shirt. Life imitates art. Or is it the other way around? Because after all, who else has my family's back but me?

I am writing down the step-by-step guide to help everyone who might be interested to do this.
1. Buy the transfer paper and cotton tee. Make sure to pre-wash shirt. This will eliminate some possibility of shrinkage that may stress the transferred image.
2. Decide on the image you want to transfer. You can scan an image into your computer, find one on the internet, or create one in an image editing software program like Adobe Photoshop. I use Google to search for silhouette clipart images and manipulated it in Photoshop. Adding borders and changing the colors. Look at how creative manipulation can transform a boring image to vibrant art.


3. Printing your image. If there are letters or numbers in the image, make sure that you have selected 'Mirror', 'Flip', 'Reverse' or a similar setting in your application. It will appear to be backwards on your print, but it will come out correctly on the fabric you transfer it to. If there is no text in your image, you may not have to reverse your image.

If you want to be sure, you can print a test page on plain paper, and when you're satisfied it's how you want it, print it onto a piece of transfer paper. Make sure to load the transfer paper so that the image will print on the correct (unlined) side.
Remove your printed iron on transfer sheet from your printer and allow the ink to dry. Do not handle the iron on transfer paper while the ink is drying. Cut the image to size.


4. Lay out the fabric. Place the t-shirt (or other cloth to which the image will be transferred) on a hard, flat surface. I used my granite counter top for this project. I placed a thick towel folded three ways and placed a pillowcase on top to smooth out any wrinkles. The work surface should be heat resistant and should be large enough to accommodate the entire area of the transfer with a little room to spare. Do not use an ironing board, bare wood, glass, or metal surface for ironing.
Preheat the iron on its highest temperature setting for at least 8 minutes. The iron must be very hot! Do not use steam. Preheat the garment for a few seconds to remove any excess moisture from the fabric and allow the fabric to cool. This will aid in the adhesion of the image to the fabric.
5. Place the transfer image-side down on the fabric. Put the transfer on the cloth precisely where you want the image to be. Be sure you have the image facing the fabric. Place a thin cardboard inside the shirt directly under the transfer paper. This will avoid having the image be printed on both sides of the shirt and also aid in making the ironing surface wrinkle-free.
6. Ironing on the transfer. Carefully read the instructions given with the transfer paper. Set the iron to the designated temperature, and wait for it to warm up. The image now needs to be 'set' on the fabric so that it does not move while being transferred. To do this, press the iron firmly over the transfer for 20-25 seconds in several areas, making sure to cover the entire transfer in this process. It is important that you press straight down for this step and lift up the iron completely when repositioning to do another area. Then, using a circular motion and light pressure, focusing on the outside of the image, and gradually move toward the center. Be sure to apply adequate pressure for an adequate amount of time for another 20-25 seconds (see the transfer paper instructions), but keep the iron moving to prevent scorching.
Always keep in mind to increase pressure when transferring image. If insufficient pressure is used, the transfer will not bond properly with the shirt. The resulting slack may crack in the wash.

7. Peeling away the backing. For a matte finish, remove the backing from the transfer paper immediately as soon as you are able to touch the transfer paper. Gently peel the backing off of the fabric in a smooth even motion. For a glossy finish, wait for the paper to cool for at least two minutes and then remove the backing paper as specified above.

8. Care for your project properly. Always turn your garment inside out. This will minimize the amount of abrasion that the transfer will encounter with other garments in the wash. Wash the garment in cold water using a mild detergent.
9. Care for left-over transfer paper. Store any left over transfer paper in a cool, dry place. After opening the shrink wrapped packages, put the paper into the resalable plastic bag, and if available, include one silica gel (desiccant) package. This will keep the paper from picking up excess moisture on high humidity days.
All images are taken by J, except for those with her in it.
Share
All images are taken by J, except for those with her in it.


6 comments:
I've always wanted to try this project but never got around doing it. I was hoping to find ready-to-iron prints somewhere :) Thanks for sharing the how-to's! I will make time for this with the kids soon.
That's really cool! I remember going to a store to have that done when I was a kid. Good to know you can just do it at home now.
a-ha...what a great idea! i will bookmark this page for future projects with my kids!
i love this! thank you for sharing.
Hi there!
Can share with me which printer you're using? HP? Canon?
I love the Dino tee you designed. Would you be able to share it with me? My boy would be so thrilled to hv a Dino tee!
Hi Leia! I used an Epson T60. Sorry I do not have the dinosaur file with me. I must've deleted it somwtime ago. But you can try to google "dinosaur silhouette clipart", I am sure you will find something your son will like.
Post a Comment
Note: Only a member of this blog may post a comment.